
PhotoCraft is a free, open-source image editor designed to feel like Photoshop. This beginner tutorial shows how to use PhotoCraft from the first launch to a finished file: opening an image or a PSD, working with layers and masks, adding an adjustment layer and text, and saving your work. The steps follow version 0.7.0, in the browser or the desktop app, with browser differences noted along the way.
PhotoCraft is made by the ArtCraft team. AI PS Online hosts the unmodified open-source web build as PhotoCraft Online and is not affiliated with ArtCraft. Photoshop is a trademark of Adobe Inc., and we are not affiliated with Adobe.
Step 1: Open PhotoCraft online or install it
Use it in your browser
- Open the online editor. There is nothing to install and no account to create.
- Give it a moment the first time. The whole app is one WebAssembly file of about 25 MB, so the first load is slower than a normal web page.
- Use an up-to-date desktop browser. PhotoCraft needs WebGPU or, as a fallback, WebGL2. If the canvas never appears, reload the page. The official hosting notes also describe adding
?webglto the address to force the WebGL2 renderer.
Or install the desktop app
Download PhotoCraft from the official PhotoCraft page. The ArtCraft Launcher installs and updates PhotoCraft along with the other Crafting Apps, or you can pick a standalone build for macOS, Windows, Linux or FreeBSD. Developers can build it from source on GitHub.
Step 2: Open an image or a PSD
PhotoCraft starts on a home screen with two buttons, New document and Open.
- Open a file. Click Open, or choose File › Open (Ctrl+O). In the browser this opens your computer's file picker, and you can select several files at once.
- Or drag it in. Drop an image or a PSD anywhere on the window.
- Or start blank. Click New document, pick a preset or enter a size, then click Create.
How to open a PSD in PhotoCraft
PSD and PSB files open like any other image, through File › Open or by dragging them in. Layers, groups, masks, type layers, smart objects, adjustment layers and layer styles come through as editable layers, so check the Layers panel to see the structure. Work on a copy of anything important: the project reports very good round-trip results, but complex files can still change slightly when saved.
In the browser, PhotoCraft has only two fonts, Inter and JetBrains Mono, because web apps cannot use the fonts installed on your computer. If a PSD's type layers use other fonts, check them carefully before you edit and save, or use the desktop app.
Flat formats such as PNG, JPEG, WebP, TIFF and GIF open too.
Step 3: Find your way around
If you know Photoshop, the layout will look familiar:
- Tools run down the left edge. Many have a single-key shortcut, such as T for Type and P for the Pen.
- The options bar under the menus shows the settings of the current tool.
- Panels sit on the right: Color and Swatches at the top, Properties and Adjustments in the middle, and Layers, Channels and Paths below.
- Edit › Search (Ctrl+F) finds any command by name.
Step 4: Work with layers and masks
Layers keep each part of your edit separate, and masks hide pixels without deleting them.
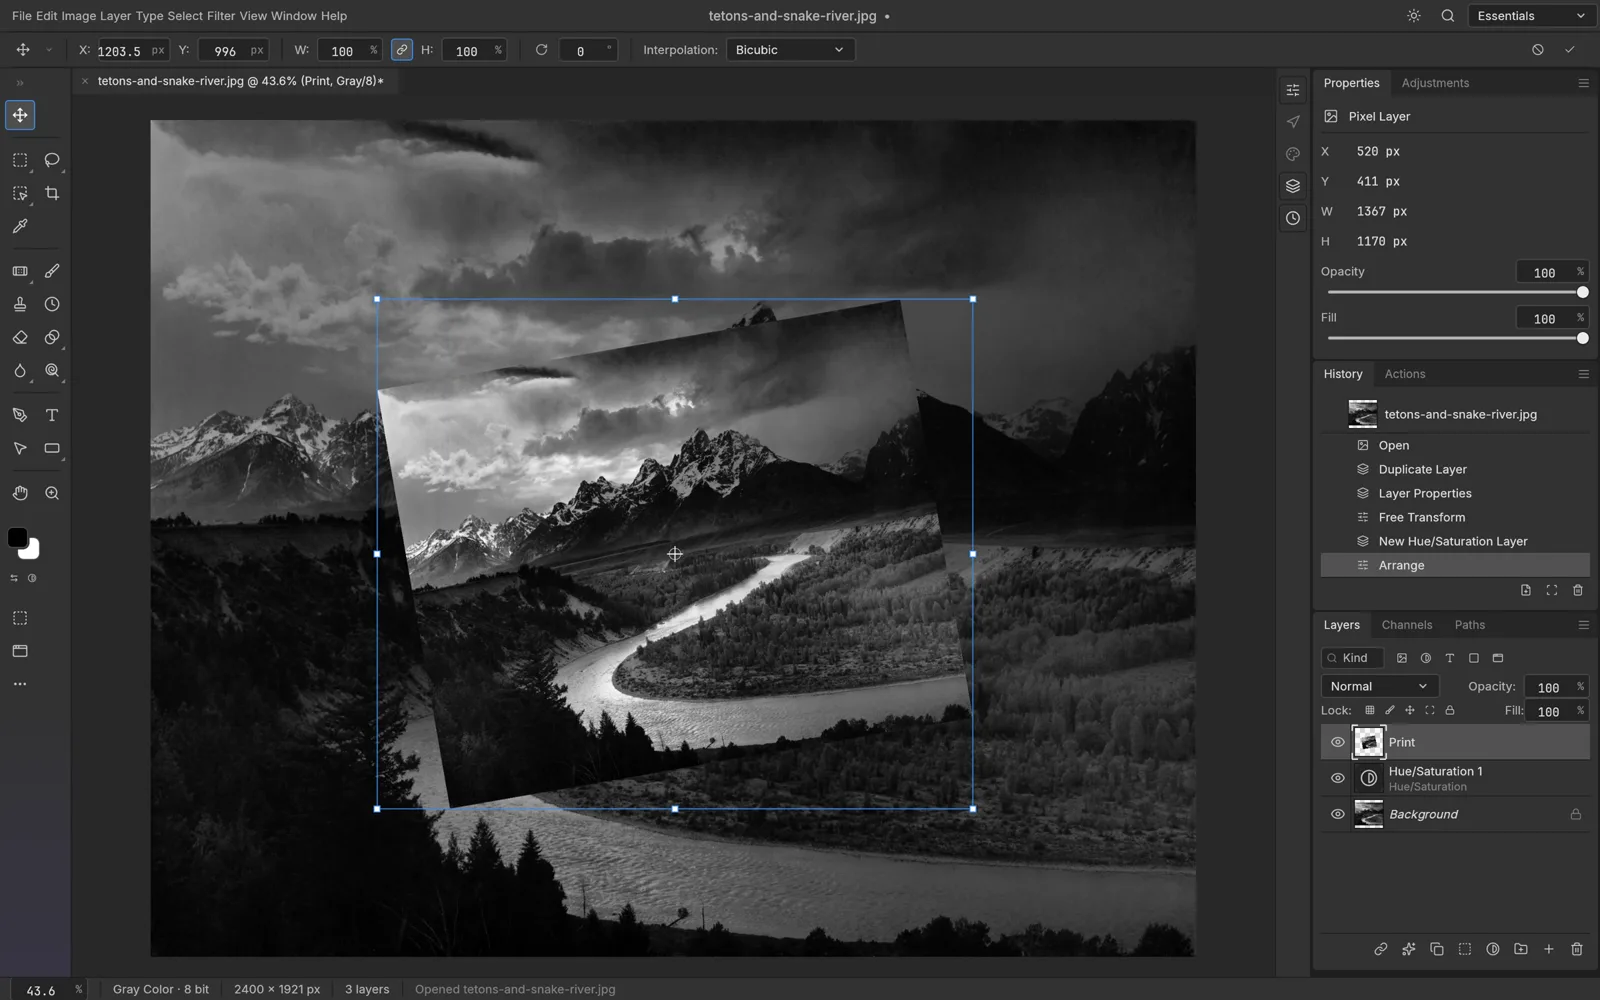
- Duplicate the photo. Choose Layer › New › Layer via Copy (Ctrl+J). You now work on a copy, and the locked Background layer stays untouched below it.
- Add an empty layer when you need one. Click the plus button at the bottom of the Layers panel, or choose Layer › New › Layer.
- Make a selection. Select › Subject gives you an automatic first pass. The marquee, lasso and Quick Selection tools let you draw one yourself, and Select › Select and Mask (Ctrl+Alt+R) refines tricky edges such as hair.
- Turn the selection into a mask. Click the Add layer mask button at the bottom of the Layers panel, or use the Layer › Layer Mask menu.
- Paint on the mask. Click the mask thumbnail, then paint with black to hide and white to bring areas back.
- Move and resize. Choose Edit › Free Transform (Ctrl+T in the desktop app), drag the handles, then press Enter or click the tick in the options bar.
Step 5: Add an adjustment layer
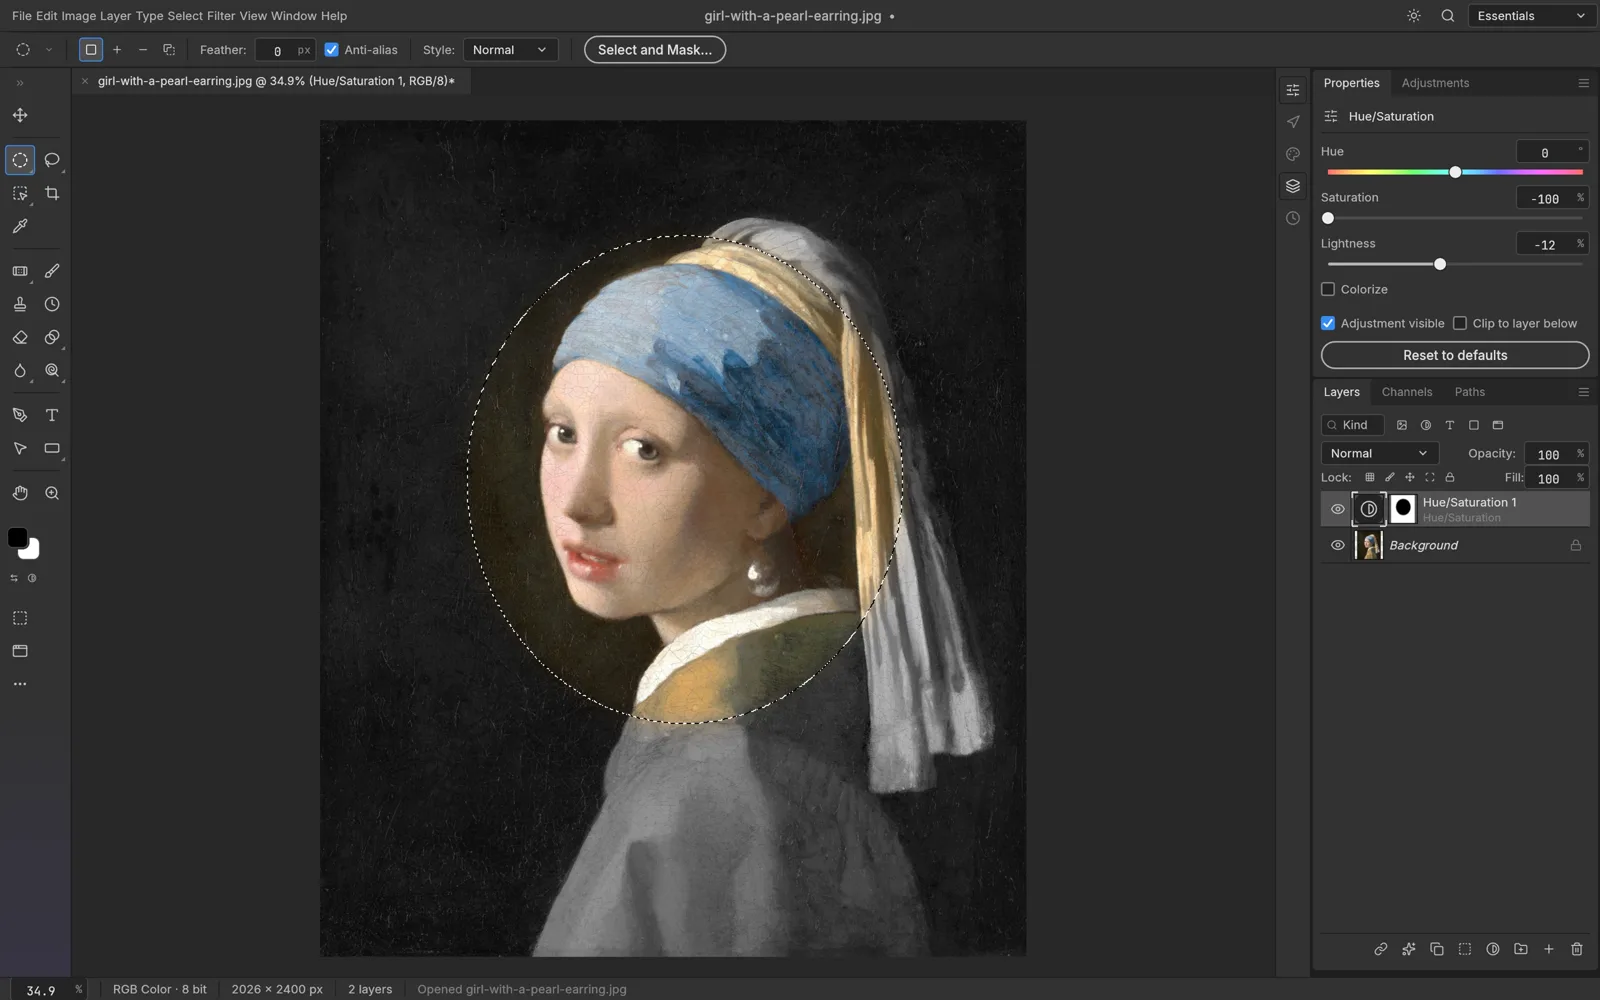
Adjustment layers change colour and tone without touching the original pixels, so you can edit or remove them at any time.
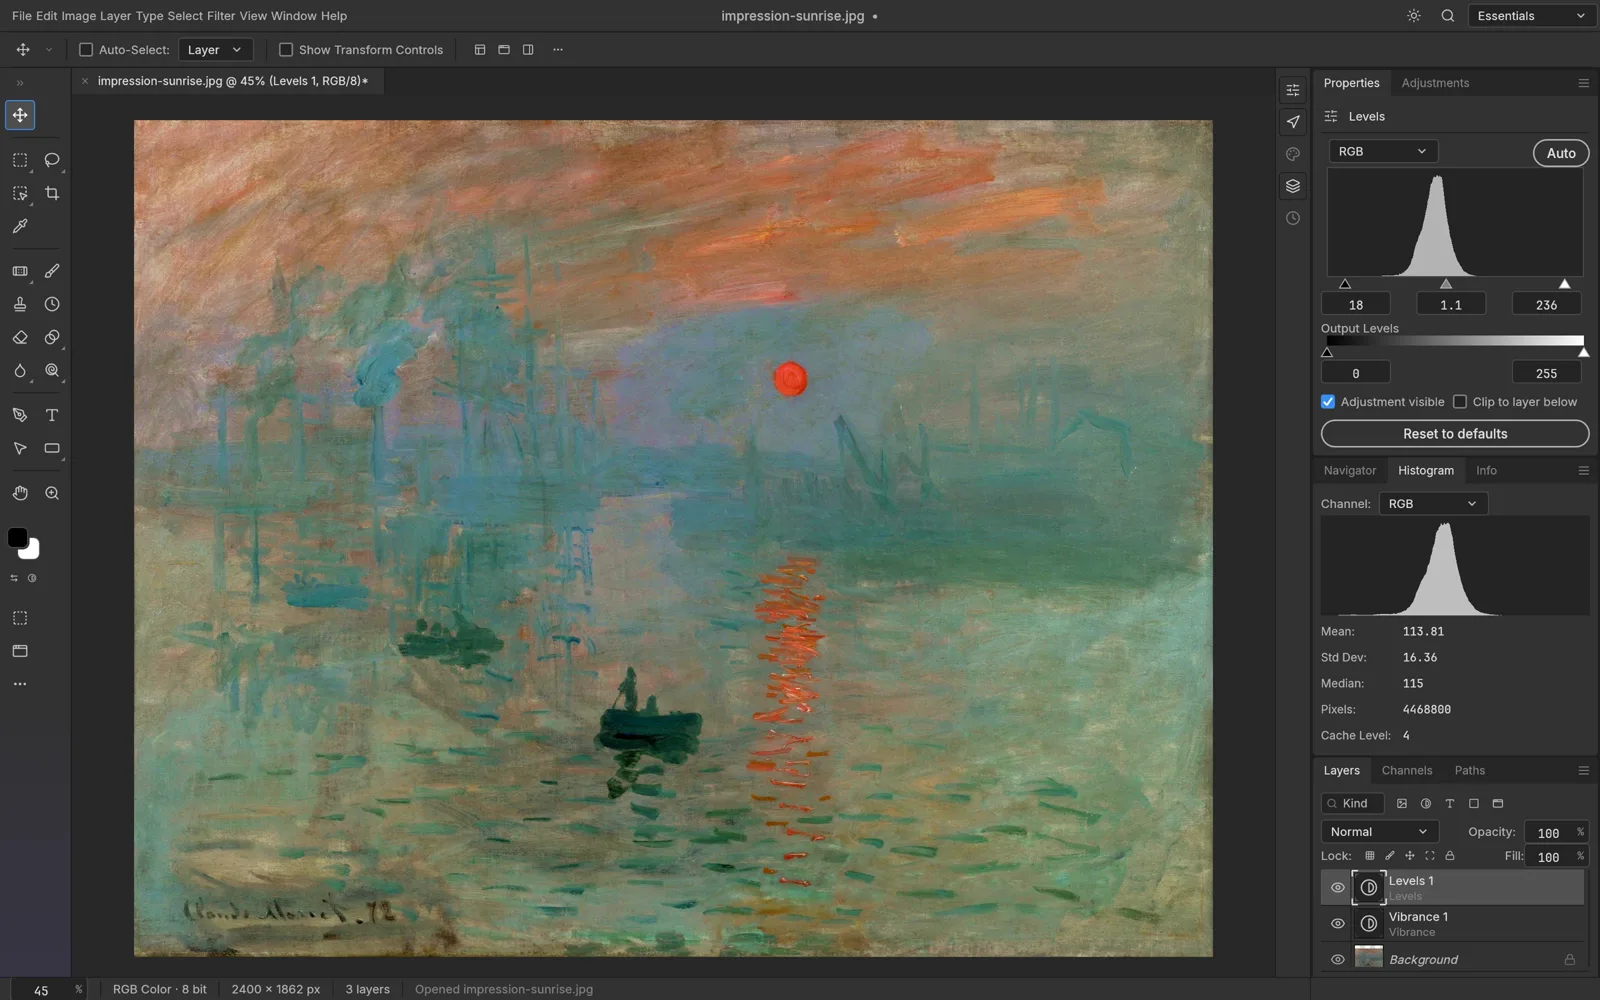
- Add one. Choose Layer › New Adjustment Layer › Curves, or click the half-filled circle at the bottom of the Layers panel.
- Adjust it. The settings appear in the Properties panel. For Curves, drag the line up to brighten and down to darken.
- Limit it to one layer. Tick Clip to layer below in the Properties panel, or use Layer › Create Clipping Mask (Ctrl+Alt+G).
- Limit it to one area. Make a selection first, and it becomes the adjustment's mask.
- Compare before and after. Toggle Adjustment visible in the Properties panel, or the eye icon in the Layers panel.
Step 6: Add text
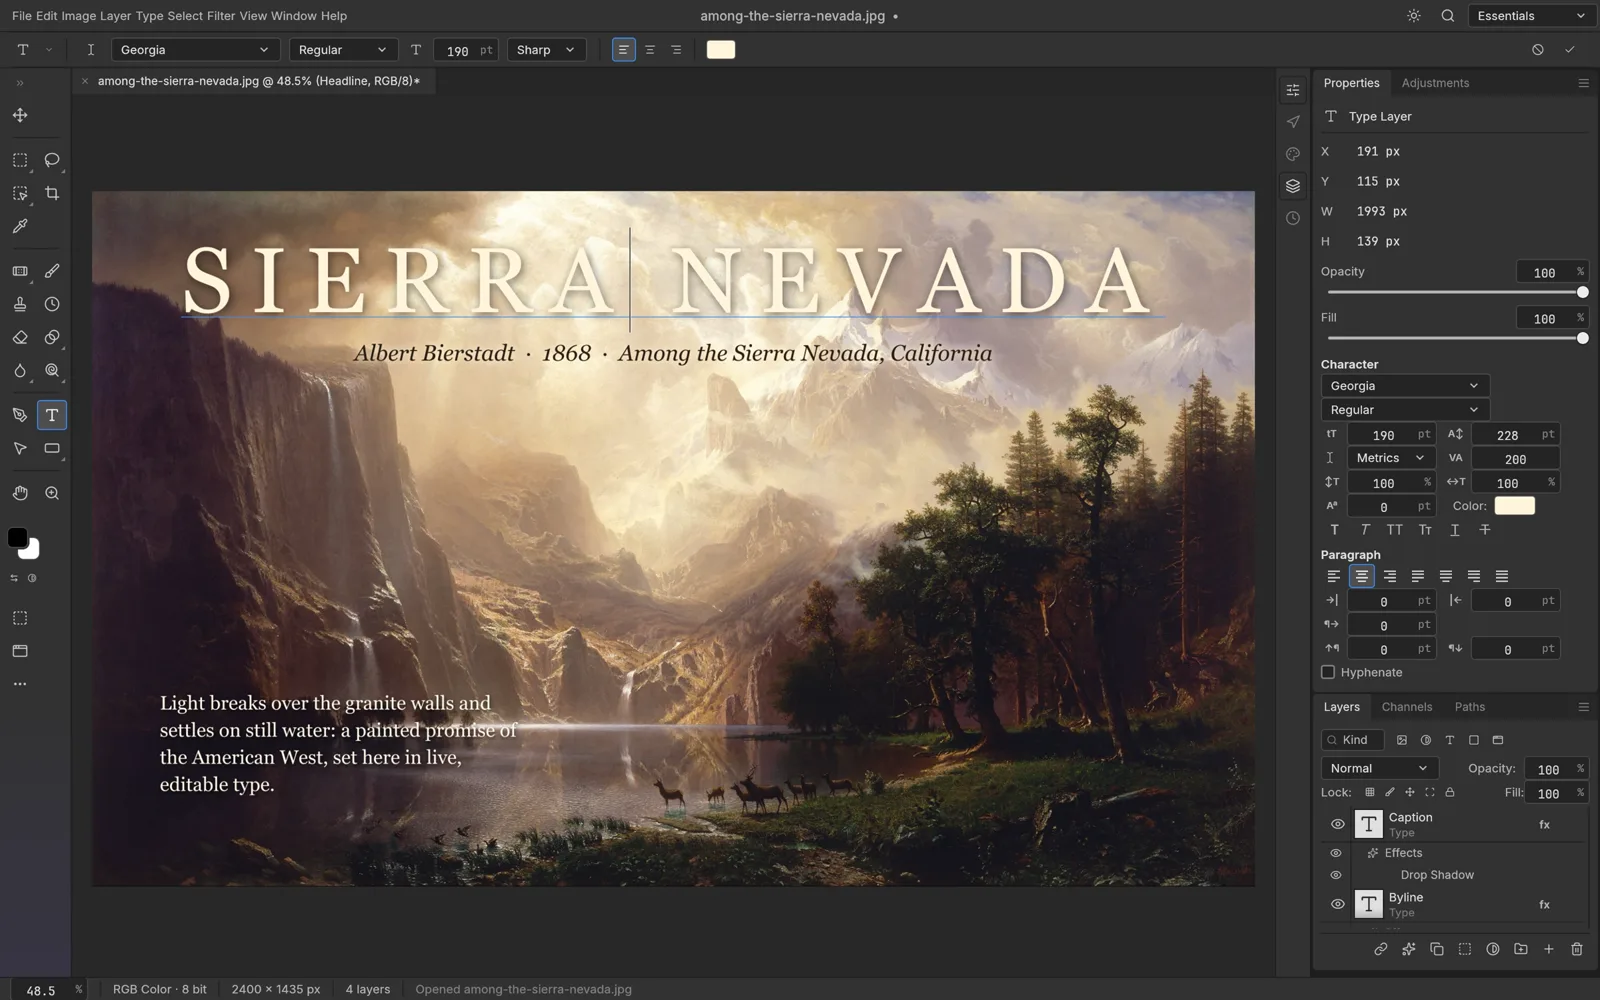
- Pick the Type tool by pressing T. The options bar shows the font, style, size, anti-aliasing, alignment and colour.
- Click on the canvas and type. Click the tick in the options bar when you're done.
- Fine-tune it. With the type layer selected, the Properties panel shows Character and Paragraph controls such as leading, tracking and alignment.
- Style it. Layer › Layer Style adds effects like Drop Shadow or Stroke, and the text stays editable.
 PhotoCraft, from its open-source repository (Apache-2.0).
Step 7: Save a PSD and export
- Save a layered copy. Choose File › Save As (Ctrl+Shift+S) and pick PSD to keep every layer, mask and type layer editable. When you've added layers to a JPEG or PNG, Save offers PSD by default.
- Export a flat image. Choose File › Export › Export As to pick a format such as PNG or JPEG, set quality and scale, and see a preview with an estimated file size. File › Export › Quick Export as PNG does it in one click.
- Save before you close the tab. In the browser, Save and Export download the file to your computer. There is no cloud autosave or crash recovery, so anything unsaved is lost when you close or reload the page.
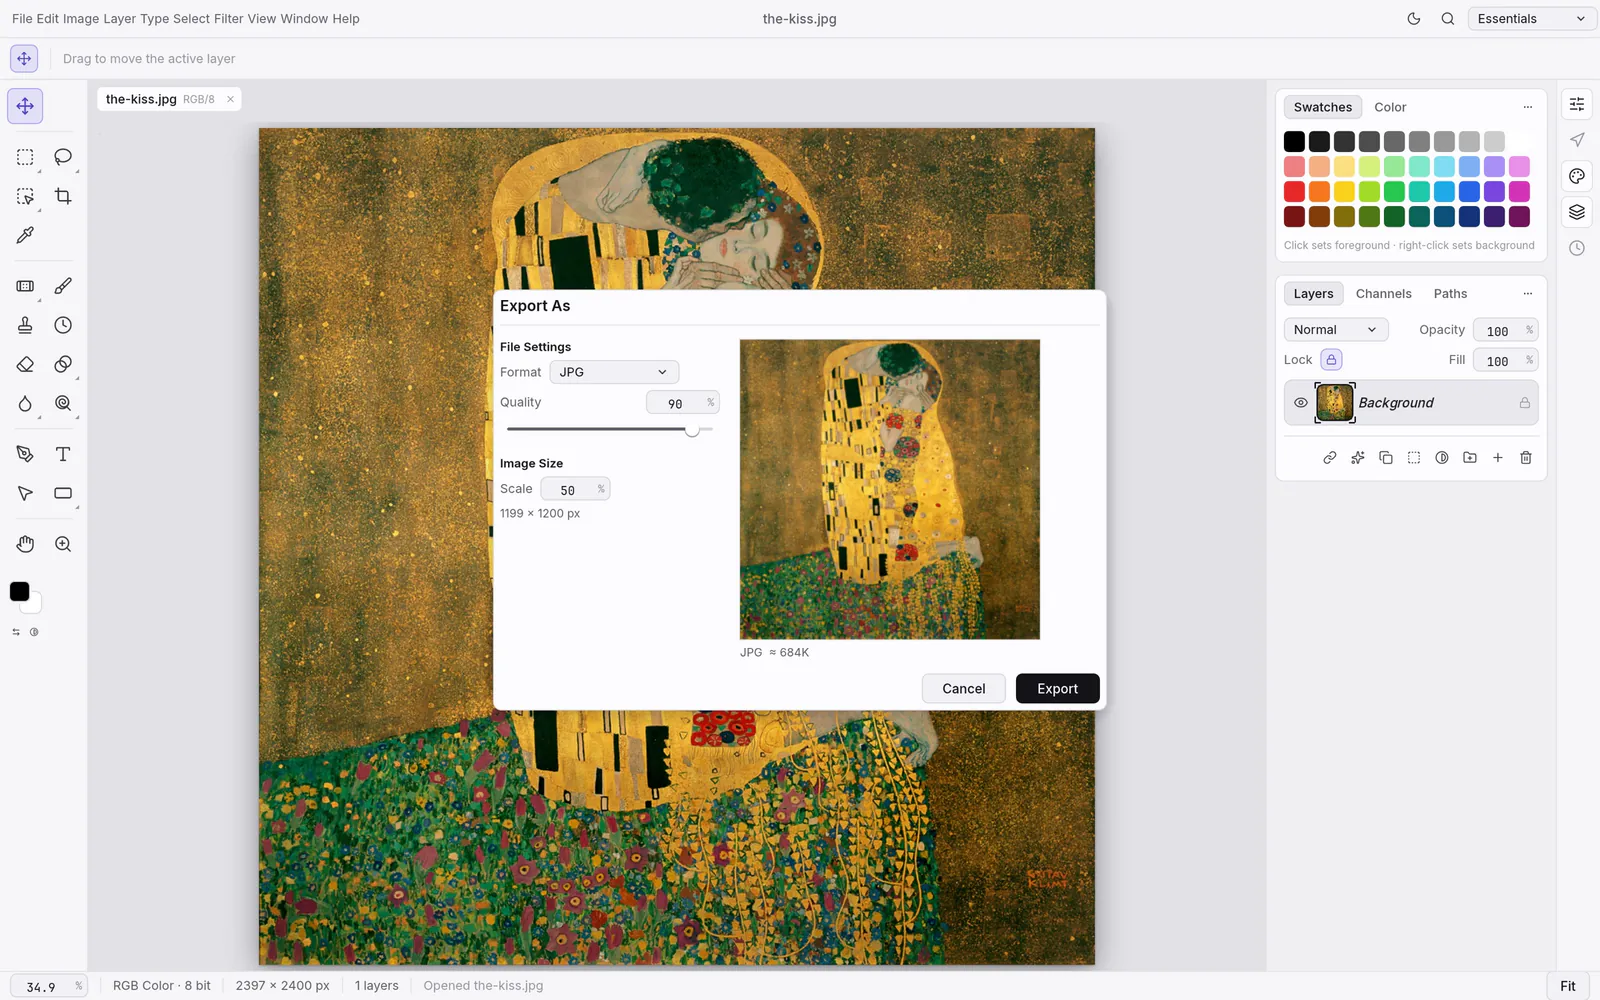 PhotoCraft, from its open-source repository (Apache-2.0).
Photoshop shortcuts that work in PhotoCraft
PhotoCraft uses Photoshop's default shortcuts for everyday commands. We checked these in the 0.7.0 menus. On a Mac, use ⌘ for Ctrl and Option for Alt.
| Action | Shortcut | Menu |
|---|---|---|
| Open | Ctrl+O | File |
| Save As | Ctrl+Shift+S | File |
| Undo / Redo | Ctrl+Z / Ctrl+Shift+Z | Edit |
| Layer via Copy | Ctrl+J | Layer › New |
| Free Transform | Ctrl+T | Edit |
| Select All / Deselect | Ctrl+A / Ctrl+D | Select |
| Inverse selection | Ctrl+Shift+I | Select |
| Select and Mask | Ctrl+Alt+R | Select |
| Group layers | Ctrl+G | Layer |
| Create Clipping Mask | Ctrl+Alt+G | Layer |
| Export As | Ctrl+Alt+Shift+W | File › Export |
In a browser tab, a few combinations belong to the browser itself. Chrome, for example, keeps Ctrl+N, Ctrl+T and Ctrl+W (new window, new tab, close tab) and their Shift versions, so they never reach the editor. Use the menu instead: Edit › Free Transform, File › New or the New document button. Edit › Keyboard Shortcuts opens the shortcut settings.
How to use PhotoCraft with AI tools
PhotoCraft is a hands-on editor, and some jobs are faster with AI. Two combinations work well:
- Cut out a subject, then refine it. Run the photo through the AI background remover to get a transparent PNG. Open it in PhotoCraft, or add it to an existing document with File › Place Embedded, then clean up the edge with a mask and place it on a new background.
- Enlarge first, then edit. If a photo is small or soft, the AI image upscaler gives you more pixels to work with before you start masking.
The AI tools need a free account and use credits, with the cost shown before each run and failed runs refunded. Photos you send to them are processed by our AI model provider, while files you edit in PhotoCraft stay on your device.
Finished this PhotoCraft tutorial and not sure the editor suits your work? Read our PhotoCraft review, compare PhotoCraft vs Photoshop and PhotoCraft vs GIMP, or meet the rest of the ArtCraft apps. To start editing straight away, go to PhotoCraft Online.
FAQ
Do I need to install PhotoCraft?
No. You can use it in a browser tab through PhotoCraft Online, with no download or account. The official site also has free desktop builds.
How do I open a PSD in PhotoCraft?
Choose File › Open (Ctrl+O) and pick the .psd or .psb file, or drag it onto the window. Layers, masks, type and adjustment layers open as editable layers.
Why does Ctrl+T open a new browser tab?
Browsers such as Chrome keep Ctrl+T, Ctrl+N and Ctrl+W for their own tabs and windows. Use Edit › Free Transform instead; in the desktop app, Ctrl+T works as usual.
Does PhotoCraft save my work automatically?
Not in the browser. There is no cloud autosave or crash recovery, so save a PSD with File › Save As, or export, before you close or reload the tab.
Can I use my own fonts in PhotoCraft online?
Not in the browser version, which has two built-in fonts, Inter and JetBrains Mono. For other fonts, use the desktop app.
Is PhotoCraft Online made by the ArtCraft team?
The editor is ArtCraft's official open-source web build, version 0.7.0, unmodified. AI PS Online hosts it independently and is not part of the ArtCraft team.